Carflow Plugins Demo Project
Note: This demo works on localhost. I.e. localhost/demo-carflow-project. Or via the file protocol. I.e. opening the HTML file directly in chrome.
This example shows the ease of integration of the Carflow Plugins.
The integration of the CarFlow API is quite easy and only has jQuery as a dependence.
The Carflow plugin needs by default 2 scripts on each page a CarFlow Plugin is placed.
<script src="https://cfmapistorp01.blob.core.windows.net/resources/Scripts/Utils.min.js" type="text/javascript"></script>
<script src="https://cfmapistorp01.blob.core.windows.net/resources/Scripts/plugin.ui.min.js" type="text/javascript"></script>
These are needed the enable the following JS snippet:
<script type="text/javascript">
	var config = {
		Environment: CFM.Environment.PROD,
		Culture: "en-GB",
		SpinnerColor: CFM.SpinnerColor.BLACK    //GRAY and WHITE are also available
	};
	CFM.API.init(config);
	CFM.API.enable("xxxxxxxx-xxxx-xxxx-xxxx-xxxxxxxxxxxx ", "<DOMSELECTOR>");
</script>
In essence this is it.
The JS snippet contains the culture (language of the values outputted by the plugin), a function code (this contains the HTML and settings) and a reference to the DOM selector in which the HTML will be injected (the value of the ID can be whatever you want).
The necessary HTML element (div with the the dom selector ID) should be placed on the location on which you want the plugin to be rendered.
<div id="domSelector"></div>Each plugin has one required JS file which is needed to enable all functionalities and interactions. Depending on the plugins used on a certain page the corresponding JS resource should be included on the page.
https://cfmapistorp01.blob.core.windows.net/resources/Scripts/Stock.min.js
https://cfmapistorp01.blob.core.windows.net/resources/Scripts/CarDetails.min.js
https://cfmapistorp01.blob.core.windows.net/resources/Scripts/Search.min.js
https://cfmapistorp01.blob.core.windows.net/resources/Scripts/Forms.min.js
https://cfmapistorp01.blob.core.windows.net/resources/Scripts/Financing.min.js
First example:
Second example:
Plugin configuration quick overview.
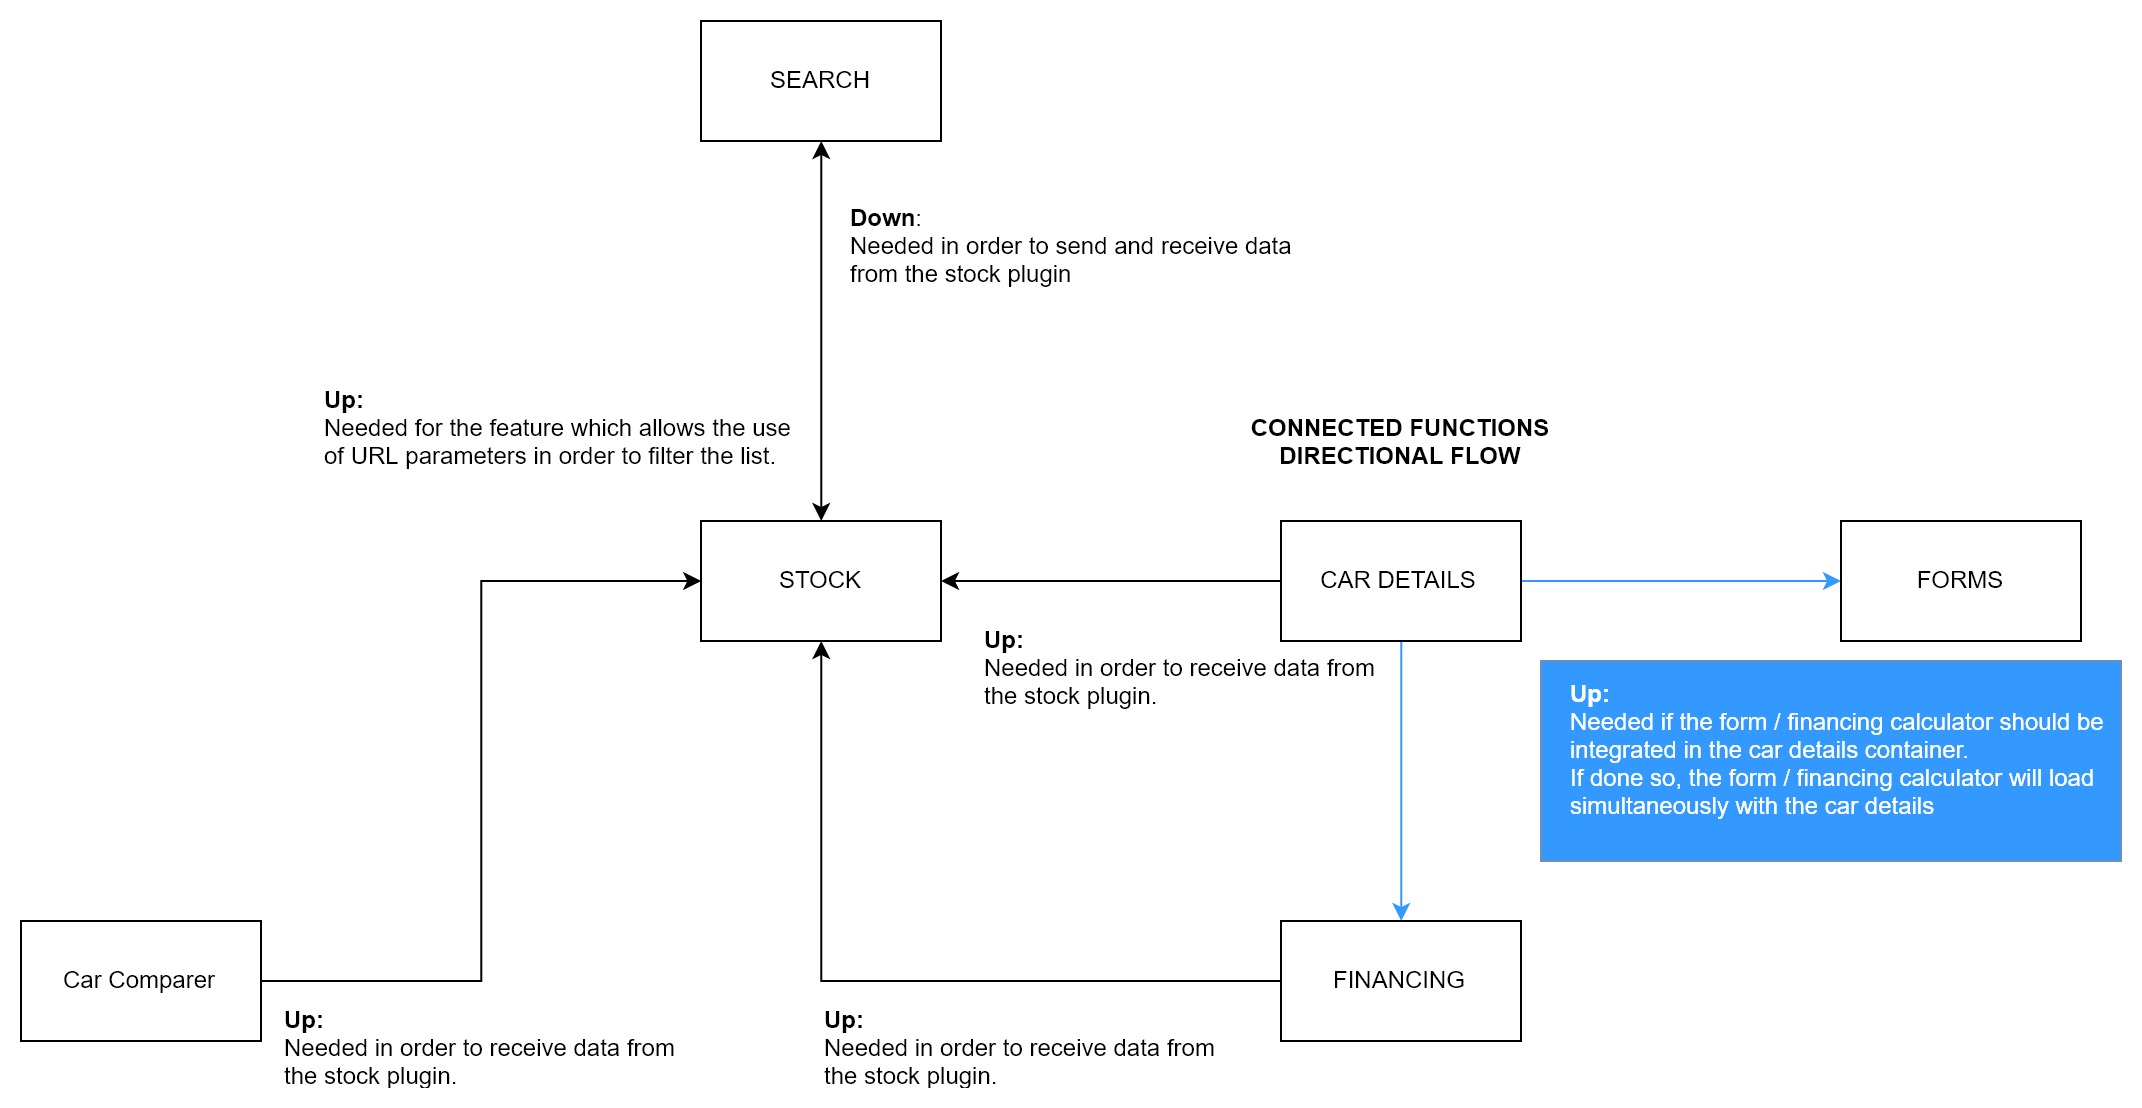
Carflow currently offers 8 plugin types.
- Stock
- Search
- CarDetail
- Form
- Financing
- CarComparer
- Vehicle Scoring (Taxation)
- Reservation
To configure the plugins an easy interface is created to create, configure and update existing plugins.
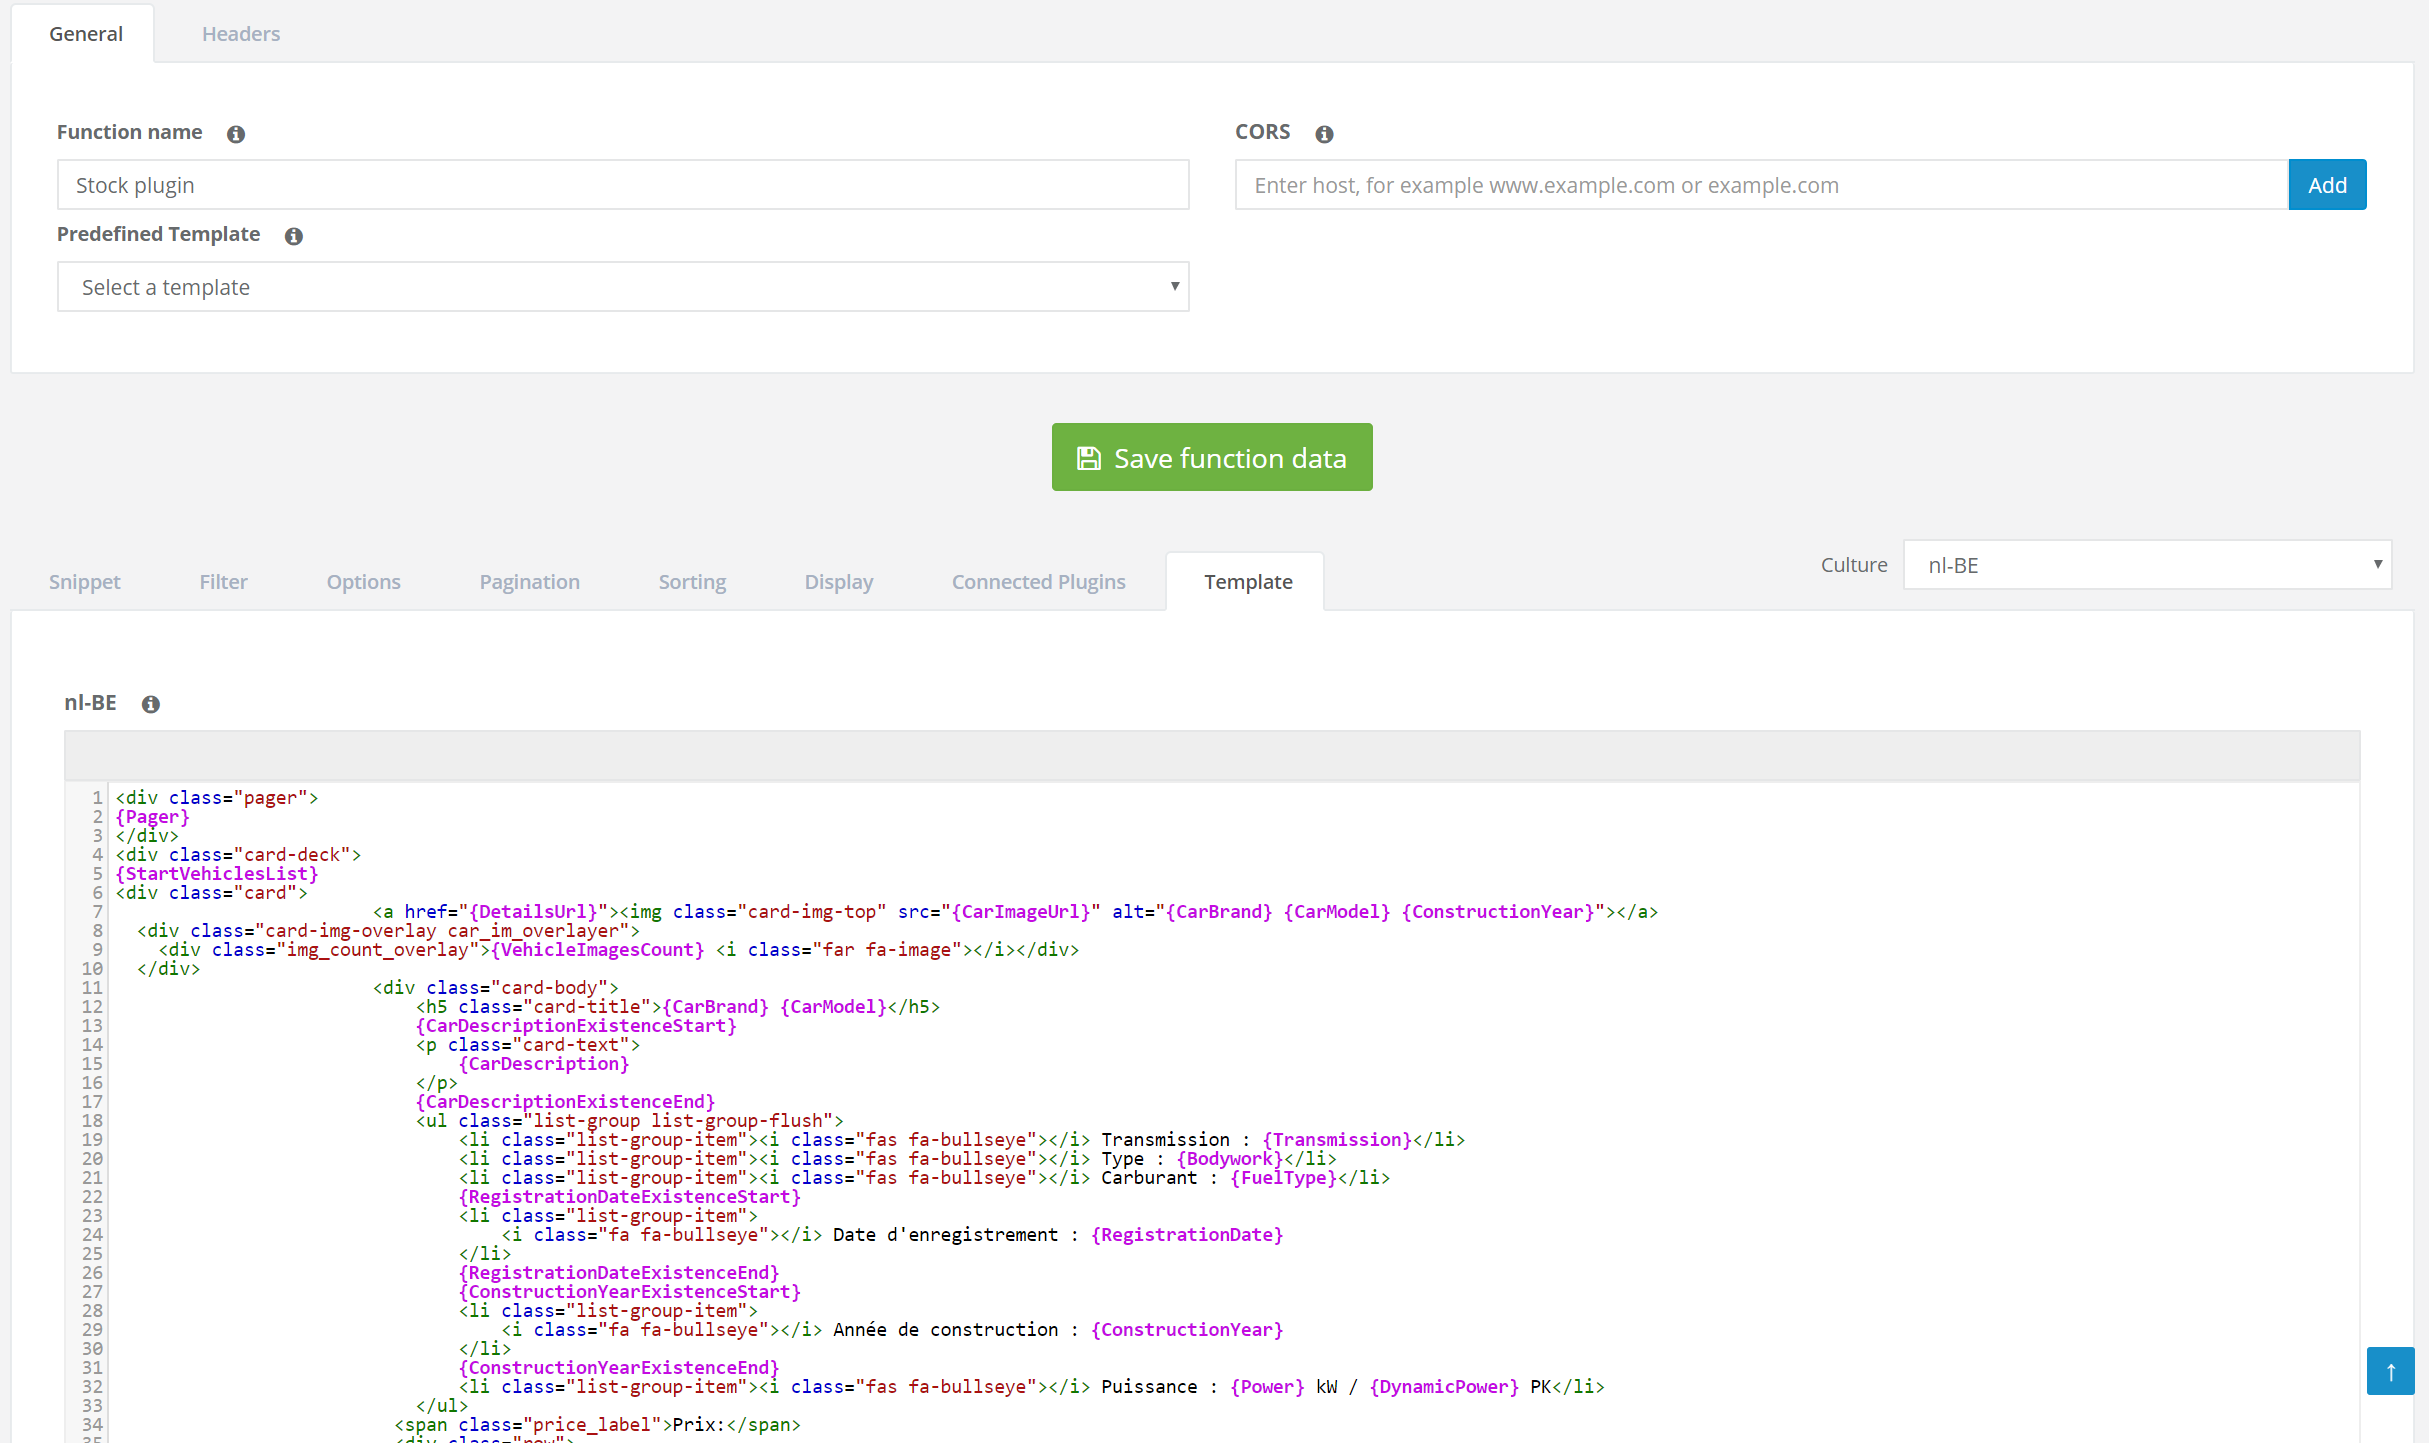
Each plugin type has it’s associated settings which can be configured. The settings are placed in different tabs associated with a plugin. A plugin is created by configuring the settings and providing an HTML template that includes the necessary shortcodes which are translated to actual values or elements when the plugin is displayed.
Connected plugins directional flow